Oil Pan, Remove & Replace
- Remove undertray
- Unbolt midpipe from exhaust (allows more wiggle room to remove the header)
- Unplug oxygen sensor harness. Use a flathead screwdriver to release the clip holding the wiring to the engine. This allows you to drop the header down without removing the oxygen sensor
- Remove header
- Remove oil pan bolts and carefully pry lower pan pan off, taking care not to damage the alumium mating surface of the upper oil pan
- Inspect and remove any RTV in the pickup with a pick tool
- Clean and prepare mating surface of the upper and lower oil pan. Because aluminum is a soft metal, it is preferrable to use plastic tools or a dulled putty knife, rather than a razer blade
- Apply RTV to the mating surface of the upper pan (following the service manual) or the lower pan (commonly done)
- Reinstall the oil pan and fasten the bolts hand tight without tools.
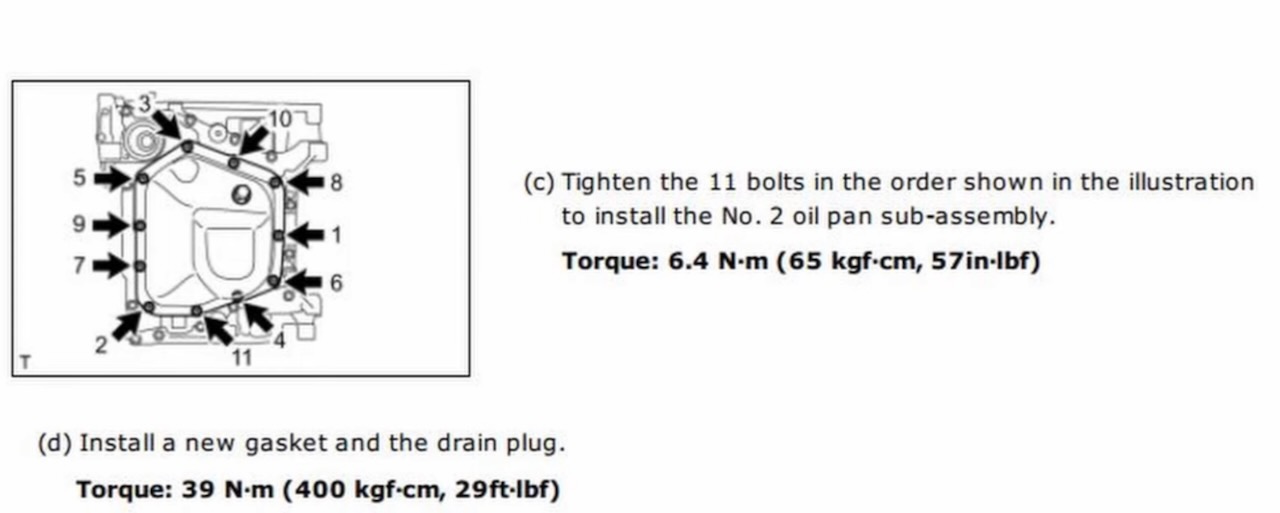
- Torque the bolts according the following specs and order
- Reinstall header and exhaust midpipe
- Plug in oxygen sensor to the header

Torque specs
| Bolt | Socket (mm) | Torque (ft·lbs) |
|---|---|---|
| Undertray (x8) | 12 | 22 |
| Undertray to transmission cover (x2) | 10 | 5.5 |
| Oil drain cover (x3) | 12 | 22 |
| Front pipe to overpipe | 14 | 31 |
| Header to engine | 14 | 22 |
| Oil pan to upper pan | 10 | 4.75 |
| Header heat shield | 10 | ? |
| O2 sensor | 22 | ? |