Installation Guide: Low-Cost Grill Mesh

Overview
Adding a metal grill insert to your existing bumper allows you to protect your radiator and oil cooler core from impacts from rocks or other road debris. If you have a BRZ, it is also helpful to protect rodents from entering your engine bay. (Ask me how I know...)
My solution to this problem is simple and materials cost is around $15.
Materials
- Mesh grill from Amazon (6x12mm Rhombus)
- Zip ties
- To secure the top of the mesh grill
- Automotive pop clips (BRZ-only)
- To secure the bottom of the mesh grill
Tools
- Automotive pop clip removal tool
- Optional, makes removing pop clips easy and reduces the failure rate
- 10mm socket and ratchet
- Tin snips or other tool for cutting mesh
- Flush cutter pliars (for cutting zip ties without sharp edges)
- Drill and drill bits (BRZ-only)
- I used 1/4 in. and 3/8 in.
Guide
Remove bumper
First you'll need to remove your bumper. If you’ve done this before, feel free to skip ahead.
There are a handful of pop clips under the front end of the car, 4 in each fender liner, and 10mm bolts and pop clips under the leading edge of the hood. You’ll need to unplug your side indicator lights and make sure you plug them back in when you reinstall.
Take note of how the bumper joins with the undertray. If you don't layer the materials correctly when you're putting it back together, the bumper will not seat properly. (Again, ask me how I know...)
If you haven't done this before, it's always a good idea to document each fastener your remove so you can put them back in the correct places. Here's an example from the first time I removed my bumper:
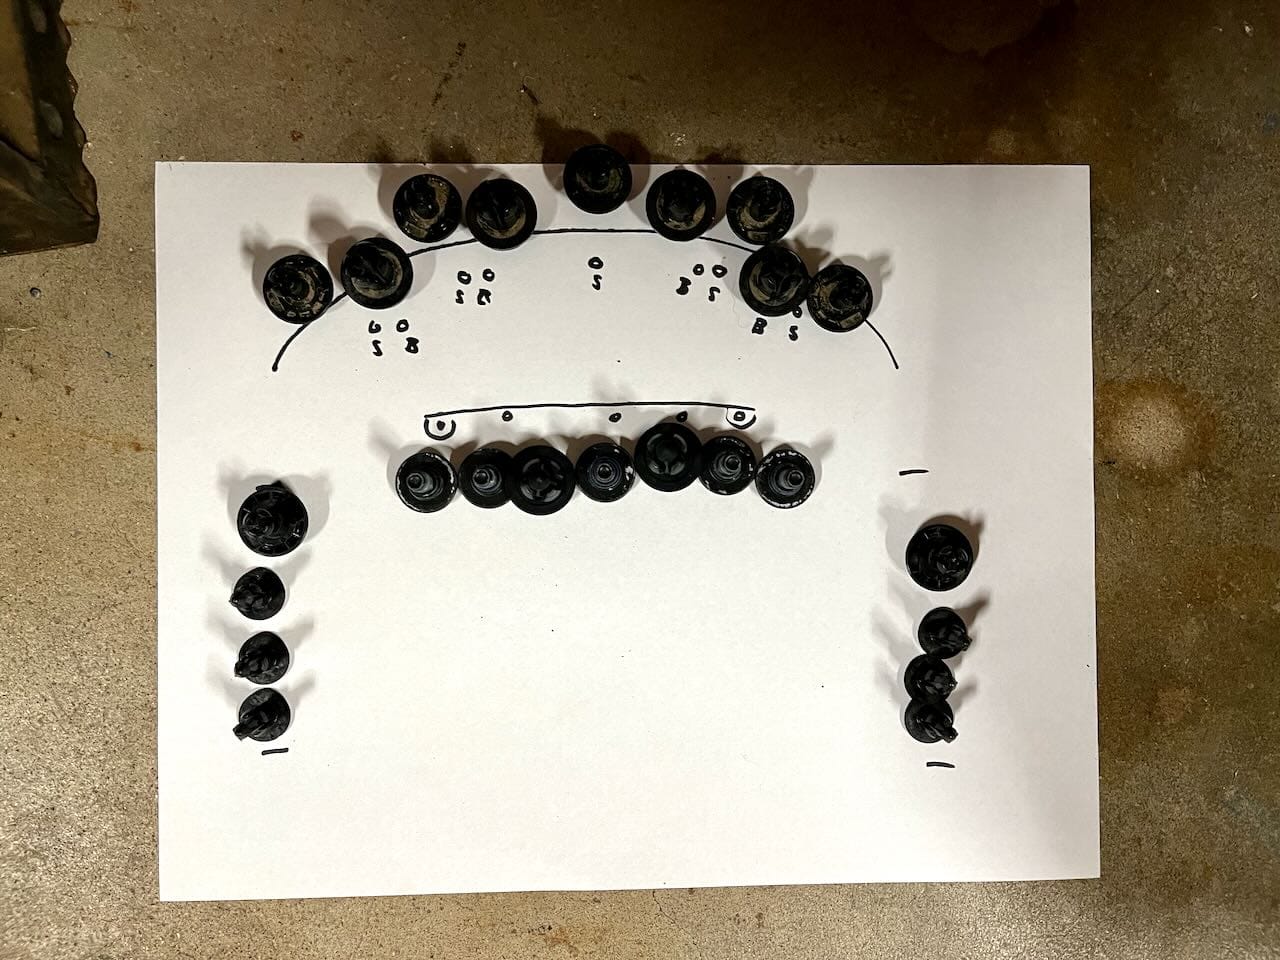
If you skip this step, just pay attention to the size of the fasteners. The different designs of fasteners correspond to different sized holes.
Cut and install mesh
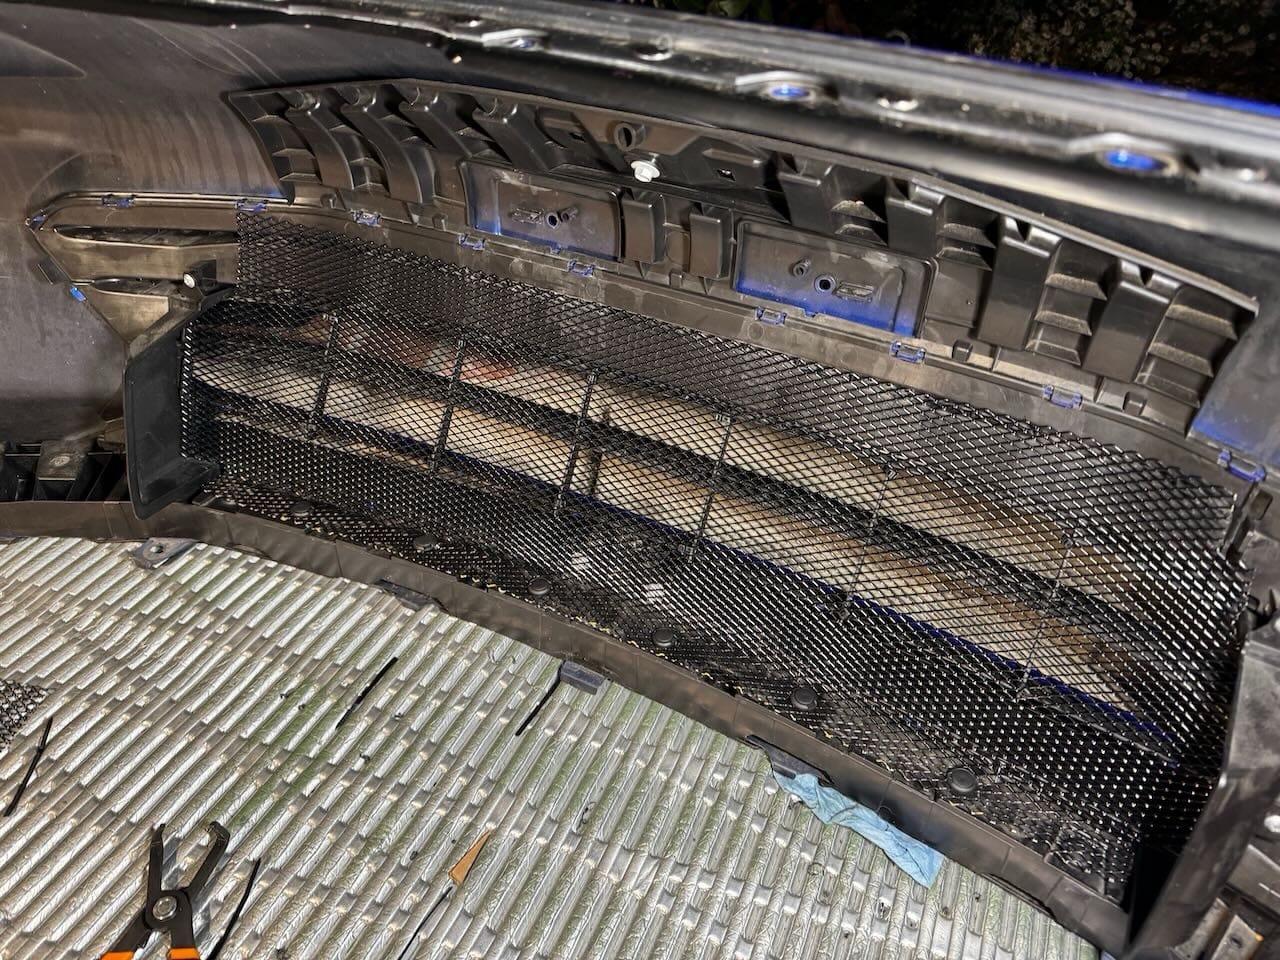
Once your bumper is off, you’ll want to make a template to help you cut the mesh. I used cardboard for this and only sized it to fit half of the bumper opening. When I transferred the cuts to the mesh, I did the left half and then flipped the cardboard over at the centerpoint.
If you have a BRZ, you'll need to leave extra mesh material at the bottom of the bumper opening, so you can attach it to the bumper with pop clips. I bent the mesh at the bottom and ran it flat against the bumper for about 1.5 inches to create a good mounting surface.
At this point, you’re ready to install the mesh to the top of the bumper with zip ties. I like to cut zip ties with flush cut pliars so there's a smooth edge and you won’t cut yourself (or others) later.
Once the top is secure, BRZ owners will need to install pop clips on the bottom. I decided to use 6 automotive pop clips, but you could probably get away with fewer. Drill out a smaller hole and then increase the size to the final size you’ll use with the pop clips. For me that was 3/8 in. If you don’t know exactly what size you need, start small and gradually increase the size until you get it right.
I drilled the pop clip holes right through the mesh material. You might find that it deforms the mesh slightly, but you can press it back flat. Insert the pop clip. You could alternatively use sheet metal screws or other fasteners, but I feel pop clips are a good choice for this.
Reinstall bumper
You’re now ready to reinstall your bumper. I start by inserting a couple of pop clips on top, where the leading edge of the hood meets the bumper. This allows you to keep the bumper in place but still manipulate it in order to get the sides to fit correctly.
You will need to apply some force to the sides of the bumper to reseat them, but the bottom of the bumper should not require much force to install. If it's not seating flush, check that the layering of the undertray and bumper are correct.
Make sure you plug your side indicator lights back in before you insert the pop clips in the fender liners.
Once you’re done, it should look basically stock, but you have additional protection.